Menü
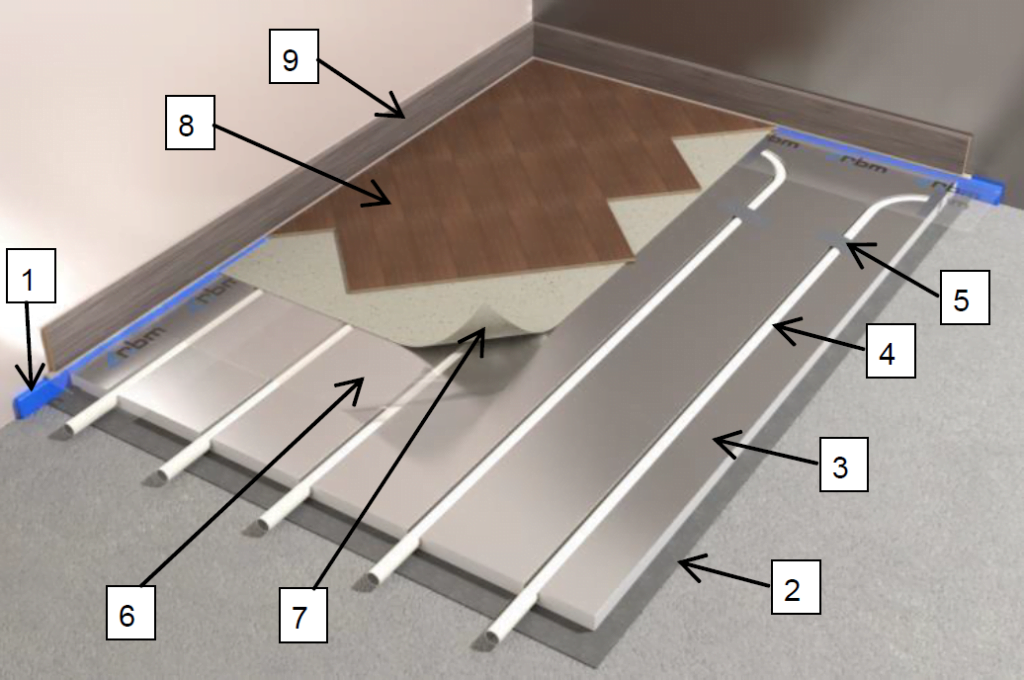
Edge insulation
Double-sided adhesive for panel fixing MAPECONTACT 2.67m/m2
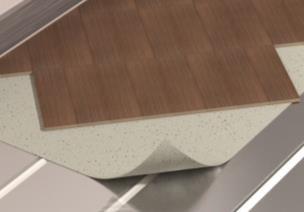
Comfort panel
RBM Tita Fix PE-RT tube Ø16×2 mm;
Preferably aluminum adhesive tape for fixing the pipe bend (requirement 1m/m2);
Protective film
Woostep Isofloor thermo washer 1.6 mm
Laminate floor
Szegély
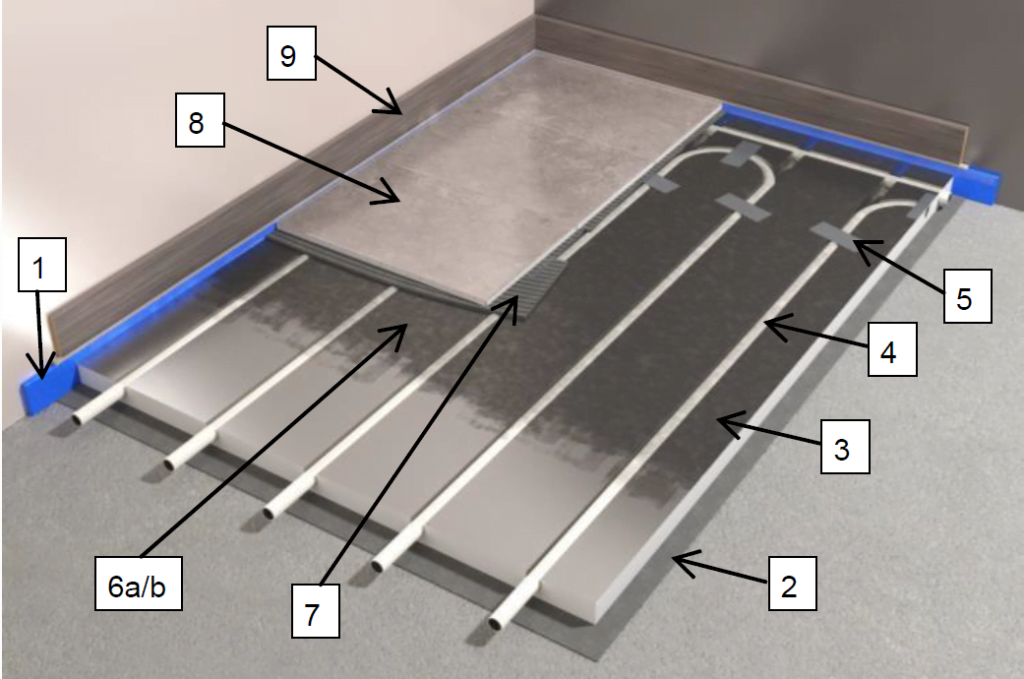
Edge insulation
Kétoldalas ragasztó a panel rögzítéséhez MAPECONTACT
Comfort panel
RBM Tita Fix PE-RT cső Ø16×2 mm
Preferably aluminum adhesive tape for fixing the pipe bend (requirement 1m/m2);
Primers
a/ Alapozó (Például PRIMER MF Mapei)
b/ Acrylic primer primer
Tile adhesive
Floor board (min. dim. 25×25 cm);
Mosólábazat
Ellenőrizze, hogy a meglévő felület, amelyen a rendszert felszerelik (simított cementhabarcs, cementcement, kerámia vagy természetes kőpadlók stb.) Mentes legyen a por és a szétválasztó anyagoktól, stabil, lapos, száraz, emelkedő nedvességtől és mechanikusan ellenálló.
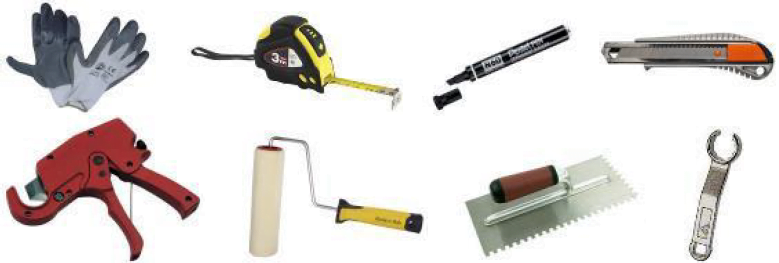
Győződjön meg róla, hogy rendelkezésére állnak a berendezés felszereléséhez szükséges eszközök (maró- és / vagy vágószerkezetek, mérő-, jelölő-, csővágó-, henger-, fogazott simító és megfelelő egyéni védőeszközök).
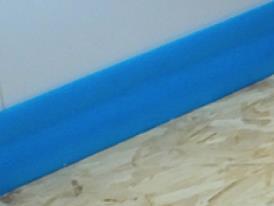
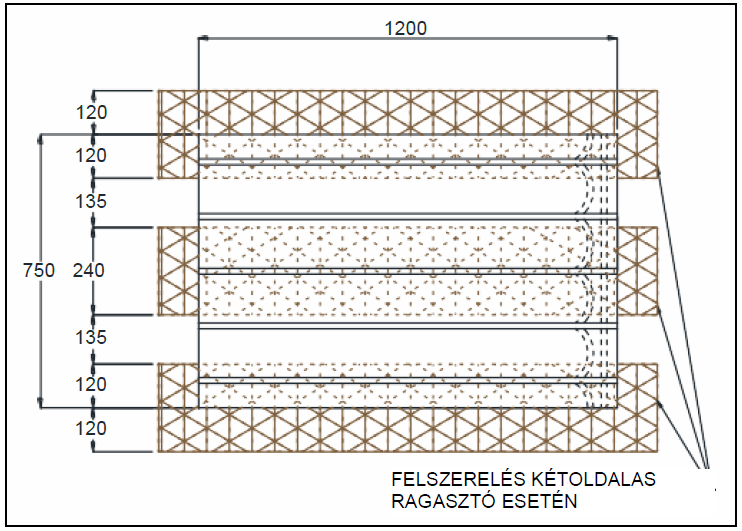
Apply the adhesive edge insulation tape around the entire perimeter of the rooms where the radiant system is to be installed and around the perimeter of all building elements that come into contact with the system, as this should always be done with Radiant Floor Systems.
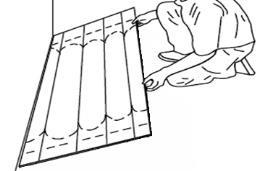
We recommend laying the entire Comfort panel system on the substrate before final gluing. This makes it possible to recognize problems and check for additional preventive markings. It may be useful to number the panels to facilitate final installation.
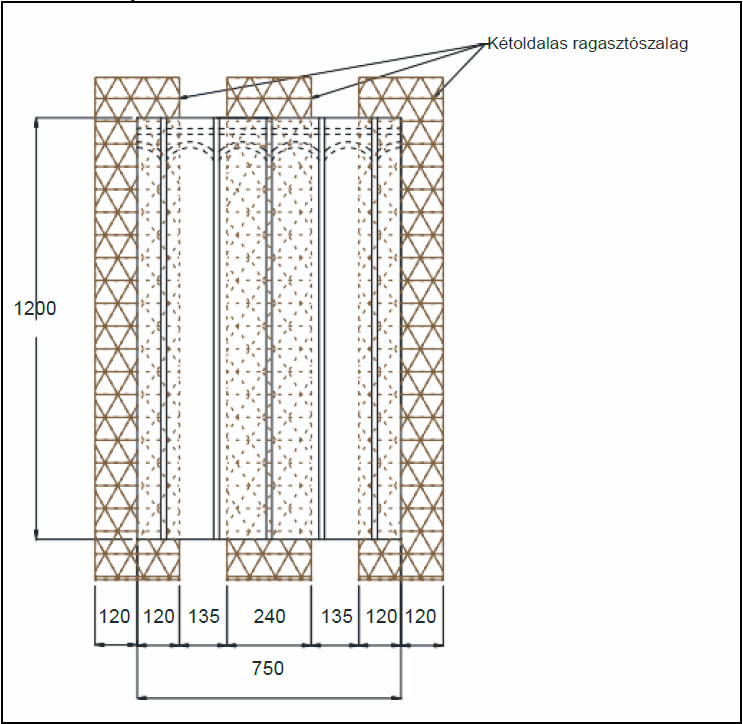
For gluing the panels to the substrate, we recommend the MAPEI® (*), MAPECONTACT tape (3a). This should be applied to the substrate on the two long sides of the panel, on two adjacent panels and in accordance with the center line of the panel (3b), along the entire length, in order to maximize the glued surface.
In case the substrate is too porous or imperfectly flat, glue the panels with MAPEI® (*) (3c) or a similar cementitious ADESILEX P4 type adhesive (use suitable solvent-free adhesives that cannot attack the real EPS A panel).
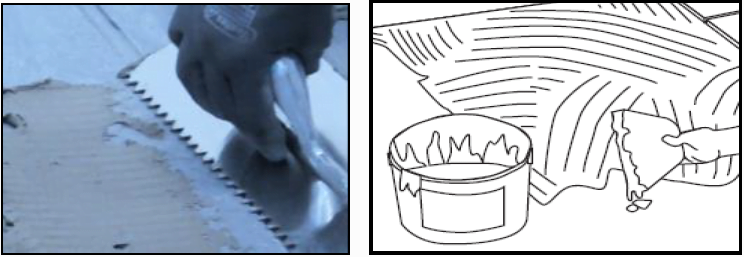
If you like (and only if allowed), then the use of water-based glue can usually be applied with a spatula (with 2 mm teeth). The temperature should be between 15-35°C. It is better to start from the farthest corner of the room so that you do not step on the glue. We apply the glue and let it dry until it is tacky so that the panels fit better for installation.
The operation can take between 10 minutes and half an hour, depending on the surface and the ambient temperature.
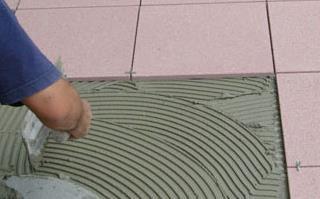
It is recommended to use a cement-based adhesive for tiles with a toothed spatula (with 3-4 mm teeth) for cement-based materials, especially for covering the ground floor or basement.
Panel gluing with cement-based adhesive
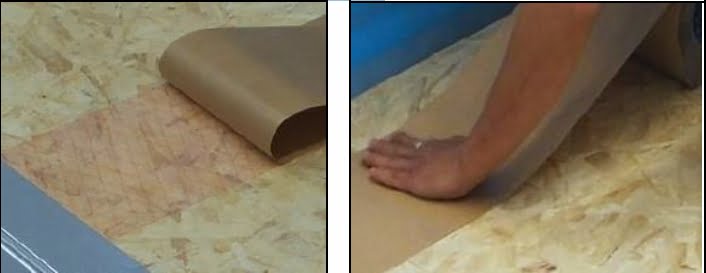
When using MAPECINACT MAPEI® (*) (4a): If the MAPECONTACT bi-adhesive tape is laid on the base, remove the protective film from the tape and carefully place the panels on it according to the assembly drawing. In the preliminary position, making sure that the panels are firmly fixed to the base.
If using a water-based adhesive (4b): Once the adhesive is on the floor and ready, place the panel, adjust and press into place. If the panels slide the glue up once, it means they are placed too early. If the adhesive has been left to dry for too long, it is generally recommended to apply another layer to the first to avoid improper bonding.
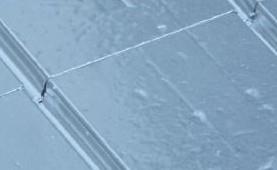
If using a cementitious adhesive for tiles (4b): Lay the panels down before they dry. Be sure to assemble the panels and carefully remove any excess glue that comes out of the joints between the panels before it dries. In general, we recommend that you do not walk on the panels while the adhesive is drying.
If using a water-based adhesive (4b): Once the adhesive is on the floor and ready, place the panel, adjust and press into place. If the panels slide the glue up once, it means they are placed too early. If the adhesive has been left to dry for too long, it is generally recommended to apply another layer to the first to avoid improper bonding.
If using a cementitious adhesive for tiles (4b): Lay the panels down before they dry. Be sure to assemble the panels and carefully remove any excess glue that comes out of the joints between the panels before it dries. In general, we recommend that you do not walk on the panels while the adhesive is drying.
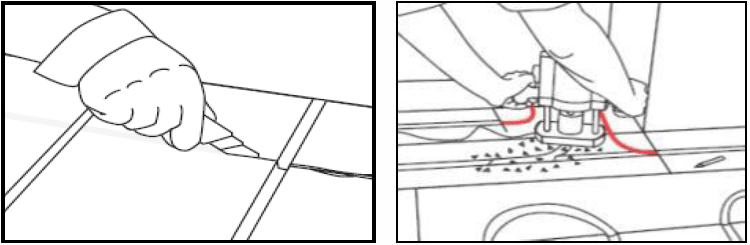
Szükséges lehet egy új horony vágására a a helyszínen, hogy egy teljes áramkört tudjunk létrehozni, különösen akkor, ha a csövek csatlakoznak a gyűjtőhöz, vagy bizonyos kanyarokat vagy útvonalakat nem követnek előre a panelen.
A horony vágása a panelen egy sniccerrel vagy elektromos horonyvágóval történhet, ügyelve arra, hogy olyan hornyot hozzon létre, amelyek megegyeznek a csõ átmérõjével (nem túl szoros vagy nem laza) – ajánlott 16 mm-es vágó).
Először rajzolja fel a nyovonalat egy tollal vagy egy jelölővel a panel felületén. A csövek ívei nem lehetnek túl szorosak (a legkisebb hajlítási sugár egy 16 mm-es cső esetében 80 mm) (5a)
Use a snicker or electric cutter to cut a 16mm wide and 17mm deep channel (5b) and completely remove all debris leaving the surface clean.
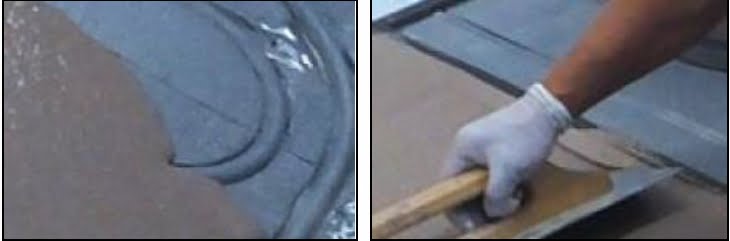
Cut the panel to size in the right place by removing the aluminum layer.
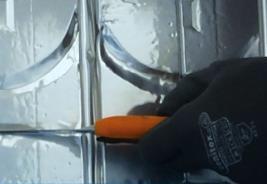
Place the aluminum tape on the cut groove to restore the aluminum layer (5d). Be sure to fit the aluminum tape properly to the bottom of the track so that it does not prevent the pipe from being inserted correctly.
The connected pipe must not come out of the groove and must be covered under the surface of the panel.
Pay attention to the grooves and panels, eliminate all disturbing circumstances.
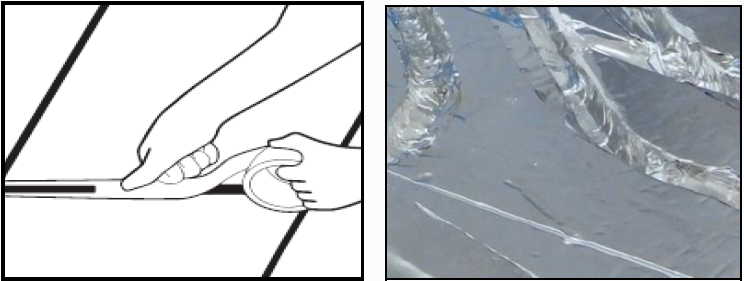
Insert the pipe (6a) using the duplex pipe laying method: connect the pipe to the distributor on the forward side, make sure the length is correct.
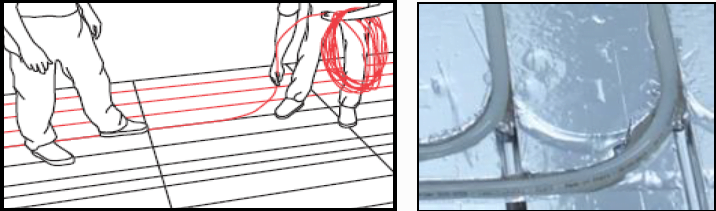
In order to protect the pipes, use a protective pipe for wall penetrations. The operation should be carried out by two people, one feeds the pipe and the other places it in the groove, use aluminum adhesive tape to fasten the curves and where the pipe protrudes from the panel for some reason. (just as we use it in the case of the "cake" system plate used in "classic" underfloor heating systems.
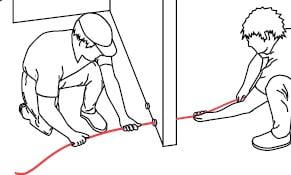
Secure the tube with tape where it comes out of place.

If a large surface needs to be covered, it is advisable to use a self-leveling material.
After the floor heating has been installed, carry out the pressure test (see EN-1264 standard 6 bar 24 hours). changing the durability characteristics.